
Scrolling through social media, it is easy to feel intimidated by the incredibly intricate, flawless nail designs people are creating at home. It looks like magic, but the secret isn’t some mysterious artistic talent—it is having the right supplies.
When you are first starting out, the nail art aisle at the beauty store can be completely overwhelming. There are hundreds of brushes, liquids, stamps, and powders. If you buy the wrong things, you will end up wasting money and getting frustrated.
The truth is, you do not need a massive, expensive collection to create beautiful nails. You just need a few strategic, high-quality basics. If you want to start experimenting with your manicures but do not know where to begin, we have compiled the ultimate list of essential nail art tools for beginners. These are the exact items that will allow you to create 90% of the popular designs you see online.
The Absolute Foundation (Do Not Skip These)

Before you even think about drawing flowers or placing rhinestones, your actual nail and the base polish need to be prepped properly. These are non-negotiable basics.
1. A High-Quality Base Coat
Many beginners think a base coat is just a clear polish, but it is not. A true base coat is formulated with sticky resins that grab onto the colored polish and bond it to your nail. Without it, your colored polish will peel off in sheets within a day. More importantly, if you are using dark colors (blues, reds, blacks), a base coat prevents the pigments from staining your natural nail plate yellow.
2. A Fast-Drying Top Coat
Your top coat is the shield that protects your hard work. It seals in the color, adds a beautiful glossy finish, and prevents your nail art from chipping. Look for a top coat that specifically advertises “fast-drying” or “chip-resistant.” A thick, gel-like top coat is highly recommended because it also smooths out any slight imperfections in your painting.
3. A Good Basic Polish Collection
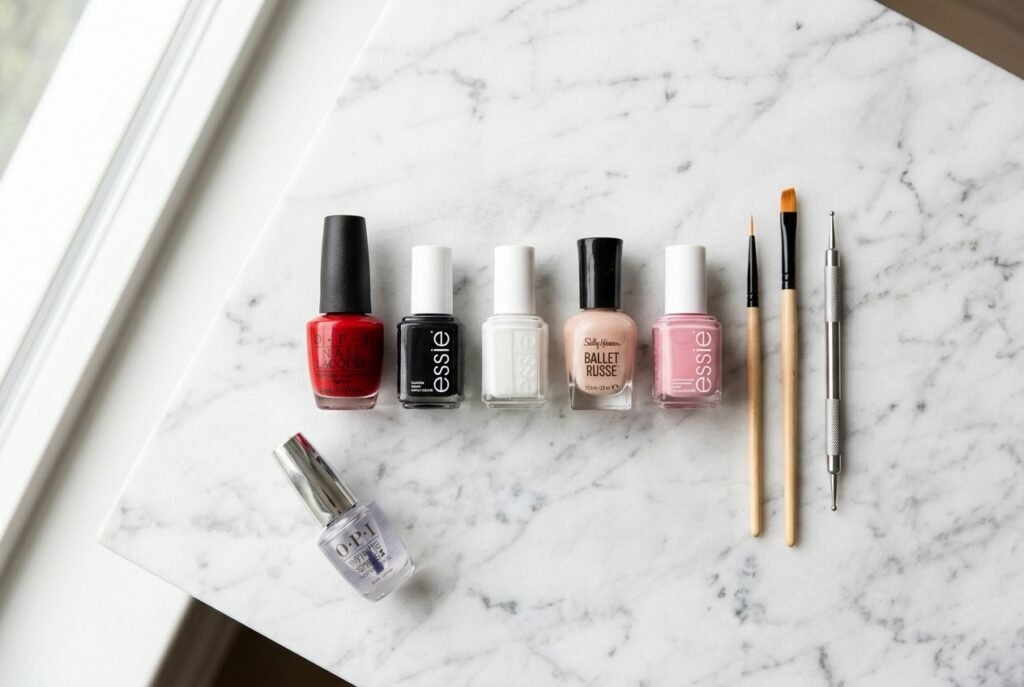
You do not need 100 bottles. To start, you only need a well-curated collection of about 5 to 7 colors. Make sure you have:
- A crisp, opaque white.
- A solid, true black.
- A classic cherry red.
- A sheer nude or pink (for French tips and layering).
- One or two of your favorite trendy colors.
- Pro Tip: High-quality, pigmented “creme” polishes (ones with no shimmer or glitter) are the easiest to paint with and provide the best canvas for art.
4. 100% Pure Acetone
You will need acetone for two reasons. First, for removing polish and cleaning up mistakes. Second, acetone is the only thing that will properly dissolve nail glue or peel-off base coats. Do not buy “nail polish remover” that is acetone-free for cleanup—it does not have the chemical strength to wipe away wet mistakes cleanly.
The Core Art Tools (The Real Magic Makers)

Once your nails are prepped and painted, these are the tools you will use to actually create the designs.
5. A Detail Brush Set
This is the single most important investment you can make. The fat, clunky brush that comes inside a bottle of nail polish is impossible to use for detailed art. You need a set of fine-tipped nail art brushes.
- Detail Brush: Has a very long, ultra-thin tip. Perfect for drawing thin lines, swirls, writing letters, and creating delicate flowers.
- Striper Brush: Longer and wider than a detail brush, but still very thin. It is specifically designed for drawing long, perfectly straight lines (like French tips or geometric shapes) in one single stroke.
- Short Flat Brush: Looks like a tiny square paintbrush. It is excellent for blending colors, creating gradient effects, or packing on heavy glitter.
6. Dotting Tools
If you want to make perfect polka dots, you need a dotting tool. These are metal or wooden sticks with small, perfectly round metal balls on the ends. They come in various sizes, allowing you to create tiny pinpoint dots or larger, bold circles.
- The Budget Hack: If you do not want to buy dotting tools, a sewing needle with the eye end, a bobby pin, or the blunt end of a pencil works surprisingly well for making dots!
7. A Silicone Nail Art Mat
This is a modern game-changer for essential nail art tools for beginners. A silicone mat provides a non-stick surface where you can mix colors, practice your brush strokes, or create “stamping” decals without ruining your kitchen table. Because it is silicone, dried polish peels right off effortlessly, making cleanup take two seconds.
8. An Angled Clean-Up Brush
When you are doing nail art, you will get polish on your skin and cuticles. It is unavoidable. Instead of using a cotton swab (which leaves fuzzy lint behind and smudges the polish), buy a cheap angled eyeliner brush or a dedicated clean-up brush. Dip the tip in pure acetone, and you can precisely “erase” any mistakes right up to the edge of your nail, leaving a perfect, crisp line.
The “Next Level” Tools (For Specific Designs)

Once you have mastered the basics and want to try trending techniques, you can add these specific tools to your kit.
9. Makeup Sponges (For Ombre/Gradients)
You do not need special nail sponges. A standard, triangular cosmetic blending sponge from the drugstore is the absolute best tool for creating ombre or gradient nails. The porous texture picks up polish and transfers it to the nail in a beautiful, airbrushed, stippled effect. Just cut the sponge into small squares so you have a fresh corner for each color.
10. Nail Vinyls or Stencils
If your hands are a little shaky and you struggle to paint straight lines or perfect shapes, nail vinyls are your best friend. These are tiny stickers made of thin vinyl. You stick them onto your dried base coat, paint over them with a new color, and then peel them off while the polish is still wet. They peel away the top color, leaving a perfectly crisp, sharp geometric design underneath.
11. Tweezers for Rhinestones
If you want to add a little bling to your nails, you need tweezers. Do not use your fingers to try and place tiny rhinestones or charms—your fingers will stick to the glue, and you will end up with polish everywhere. A pair of pointed, slanted tweezers gives you total control to place tiny gems exactly where you want them.
12. A Small Pot of Nail Glue or Gel Adhesive
To make those rhinestones and charms actually stay on, you need an adhesive. A small tube of brush-on nail glue works, but for a more professional, long-lasting hold, look for a thick “rhinestone glue gel” that cures under a UV/LED lamp. Standard top coat is not strong enough to hold heavy 3D charms.
13. Striping Tape
This is a roll of very thin, self-adhesive tape. You can apply it to your nails in straight lines, chevrons, or grids, paint over it, and peel it off to create incredibly sharp, multi-colored geometric designs. It is much easier to use than trying to paint straight lines freehand.
Tools You Should AVOID as a Beginner

When buying essential nail art tools for beginners, it is just as important to know what not to waste your money on.
- Electric E-Files (Drills): These are professional tools that require training. If you use one without knowing what you are doing, you will easily drill a hole straight through your natural nail plate. Stick to hand files.
- Complex Stamping Kits: Nail stamping (where you scrape polish over a metal plate and transfer a design) looks easy in tutorials, but it has a massive learning curve. It is incredibly frustrating for beginners. Master freehand brushing first.
- Cheap, Bulky Pre-Made Kits: Those giant, plastic carrying cases filled with 500 pieces of cheap, flimsy tools for $15 are a waste of money. The brushes lose their shape immediately, and the tools are useless. Buy 5 high-quality tools instead of 100 cheap ones.
How to Organize Your New Kit

Once you have your tools, keep them organized. Nail polish can dry out if left open, and brushes can get ruined if they roll around in a drawer.
- Keep your polishes in a cool, dark place (sunlight can discolor them).
- Store your brushes horizontally (flat) so the bristles do not bend, or keep them bristle-up in a pencil cup.
- Clean your brushes immediately after use. Wipe them on a paper towel dipped in acetone until no color comes off, then wash them gently with a little dish soap and warm water to keep the bristles soft.
Frequently Asked Questions (FAQs)
What is the very first nail art tool I should buy? If you already own base coat, top coat, and polish, your first purchase should be a set of fine-tipped detail and striper brushes. Being able to draw thin lines opens up a world of designs that are impossible to create with the bulky brush inside the polish bottle.
Can I use regular paint brushes for nail art? Technically yes, but it is not recommended. Regular acrylic or watercolor craft brushes are usually too thick and absorb too much polish. Nail art brushes are specifically designed with synthetic bristles that hold just the right amount of viscous nail polish without soaking it all up.
Do I really need a top coat over my nail art? Yes, absolutely. A top coat smooths out the texture of the art, locks in loose glitter, protects rhinestones from falling off, and gives the entire design a unified, professional shine. Without it, your art will peel or rub off within a day.
How do I clean up nail art mistakes without ruining the design? Wait until the colored polish you are working with is completely dry to the touch. Then, take an angled eyeliner brush dipped in pure acetone, and gently “erase” the polish on your skin. Because the brush is thin and the polish on your nail is dry, it will clean the skin without smudging the design on the nail plate.
Conclusion
You do not need to rent a studio or buy thousands of dollars worth of equipment to start creating beautiful manicures. By gathering these essential nail art tools for beginners, you are giving yourself the exact foundation needed to practice, experiment, and eventually master the designs you see online.
Start with the basics: a good base and top coat, a couple of fine brushes, and a dotting tool. As your skills improve and you find out what types of designs you enjoy the most, you can slowly add specialized tools like vinyls or stamping plates to your collection. Grab your brushes, pick a simple design, and start practicing—your nail art journey starts today!