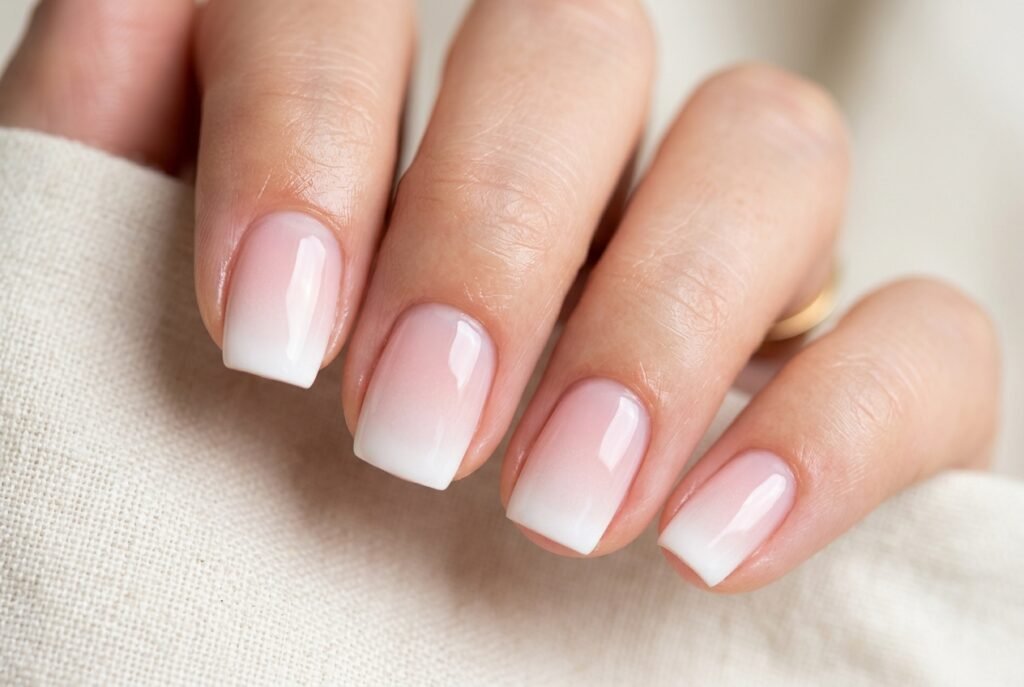

There is something undeniably mesmerizing about a flawless ombre manicure. That smooth, airbrushed gradient that seamlessly fades from one beautiful color into another looks like it took hours of professional skill to achieve. It is the ultimate way to make your nails look artistic, expensive, and highly customized.
However, you do not need to book an expensive salon appointment to get this look. Learning how to do ombre nails at home is surprisingly simple once you understand the basic technique. You do not need an airbrush machine, and you do not need to be a nail artist. With a few household items and a little bit of patience, you can create a stunning gradient manicure right at your kitchen table.
Whether you want a soft, subtle transition for the office, or a bold, neon fade for a summer festival, this comprehensive guide will walk you through the three easiest methods to achieve the perfect ombre nails.
What Exactly Are Ombre Nails?

The term “ombre” comes from the French word meaning “shadow” or “shade.” In the nail world, an ombre manicure (also widely referred to as gradient nails) is a technique where two or more colors blend smoothly into each other.
Unlike a traditional French tip where there is a harsh, distinct line between the color and the tip, an ombre blurs the lines. The color usually starts heavier at the cuticle or the tip and gradually fades out until it completely disappears into the base color.
The Secret Tool You Already Have in Your House
Before we dive into the methods, you need to know about the magic tool: a makeup sponge.
You do not need to buy any special nail art sponges. A standard, triangular cosmetic blending sponge (the kind used for foundation) is actually the absolute best tool for creating nail gradients. The tiny, porous holes in the sponge pick up polish and transfer it to the nail in a stippled, dotted pattern. When you dab it repeatedly, those dots overlap and blend together, creating a flawless, soft-focus gradient.
Method 1: The Classic Makeup Sponge Technique

This is the most popular, reliable, and versatile method for creating ombre nails. It works with any combination of regular nail polish and allows you complete control over where the colors fade.
What You Need:
- A base coat and a fast-drying top coat
- 2 or 3 colors of regular nail polish (a light base color and a darker color for the tip)
- A triangular makeup sponge
- Nail polish remover and a small detailing brush (or an old eyeliner brush) for clean-up
Step-by-Step Guide:
1. Prep and Base: Apply your clear base coat and let it dry completely. Then, apply 1 to 2 thin coats of your lightest chosen color (this will be your base color) and let it dry 100%. If your base color isn’t completely dry, the sponge will peel it right off.
2. Paint the Sponge: Take your makeup sponge and paint a horizontal stripe of your darker color directly onto the sponge. You only need a section of the sponge that is wide enough to cover one nail.
3. Dab, Don’t Wipe: This is the most important step. Align the painted part of the sponge with the tip of your nail. Gently dab the sponge straight up and down. Do not wipe or rub it side to side. Dabbing transfers the polish in tiny dots that blend together. Wiping will just smudge the polish.
4. Build the Gradient: Dab the sponge 3 to 5 times on the same nail, reloading the sponge with polish if necessary. Each dab will make the color darker and push the gradient further down the nail. Stop dabbing when you achieve the fade you like.
5. Repeat: Move quickly to the next nail and repeat the process. You must do this while the polish on the sponge is still wet.
6. The Magical Clean-Up: This technique is messy, but do not panic. Your cuticles and the skin around your nails will likely have polish on them. Wait about 5 to 10 minutes until all the polish on your nails is completely dry to the touch. Then, dip your small detail brush into pure acetone (or regular nail polish remover) and carefully wipe away the polish on your skin. It will peel away cleanly, leaving a crisp, perfect line.
7. Top It Off: Once your skin is clean, apply a generous, smooth layer of fast-drying top coat. The top coat will melt the stippled dots together, turning the matte, sponged look into a perfectly smooth, airbrushed gradient.
Method 2: The “Gradient Polish” Cheat Code

If you love the look of a gradient but absolutely hate the mess of the sponge method, beauty brands have created a brilliant shortcut: Gradient Polishes (like the popular Sally Hansen Miracle Gel Gradient line).
How It Works:
These specialized bottles come with a regular brush on one end, and a built-in sponge applicator on the other end. The bottle is internally divided, containing a lighter color on one side and a darker color on the other.
The Steps:
- Paint your nails with the brush side using the light color as your base. Let it dry.
- Squeeze the bottle gently until the darker color flows into the sponge applicator.
- Dab the built-in sponge directly onto the tip of your nails.
- Clean up the edges with a brush and acetone, and apply a top coat.
Pros and Cons: This is the cleanest, fastest way to do diy ombre nails. However, you are limited to the pre-mixed color combinations provided by the brand, whereas Method 1 allows you to create infinite color combinations from your existing polish collection.
Method 3: The Dip Powder Ombre (For Ultimate Durability)

If you want your ombre to last for 3 to 4 weeks without chipping, doing a gradient with dip powder is the way to go. The technique is slightly different than regular polish.
The Steps:
- Prep your nail and apply your clear dip powder base coat.
- Instead of dipping the whole nail into the color powder, use a small, fluffy makeup brush (like an eyeshadow brush) to pick up the darker colored powder.
- Gently brush the dark powder onto the top half of your nail, fading it as you move toward the center.
- Tap off the excess powder, seal it with an activator, and file it smooth.
- You can repeat this step with a third color (like a glitter) just at the very tip for a stunning 3-color dip powder ombre.
5 Stunning Ombre Color Combinations to Try

One of the best things about learning how to do ombre nails at home is that you can mix and match any colors in your collection. If you need inspiration, here are five gorgeous, trending combinations:
1. The Classic French Fade (White to Sheer Pink) This is the most wearable, elegant ombre. Use a sheer, milky pink as your base, and sponge a crisp, opaque white at the tips. It looks like a softer, more modern version of a traditional French manicure. Perfect for weddings or professional settings.
2. The Icy Winter Gradient (White to Icy Blue) Start with a solid, bright white base. Sponge a translucent, icy blue (or a blue-tinted glitter) from the tips fading downward. It looks exactly like frozen ice and is incredibly festive for the winter holidays.
3. The Sunset Vibes (Peach to Hot Pink) Start with a soft, creamy peach or yellow base. Sponge a vibrant, hot pink or coral from the cuticle area fading toward the tip. It is warm, cheerful, and looks amazing on almond or coffin nail shapes.
4. The Galaxy Effect (Black to Purple to Blue) For a dramatic, nighttime look, use a deep black as your base. Sponge a dark purple in the middle, and a deep metallic blue at the tips. Finish it off by dabbing a tiny bit of fine silver glitter over the whole nail to mimic stars.
5. The Neon Summer Fade (Clear to Neon Pink/Green) Paint your nails with a clear glitter base coat. Sponge bright, matte neon pink or lime green just at the tips, fading it quickly so most of the nail remains clear. It is a fun, Y2K-inspired look that is perfect for vacations.
Pro Tips for a Flawless Gradient Every Time

Even with the right tools, gradient nails can sometimes look streaky or patchy. Here is how to avoid common mistakes:
- Use Polish That Is NOT “Quick-Dry”: Quick-dry polishes dry on the sponge before they even hit your nail, resulting in a sheer, patchy application. Use standard, regular nail polish for the sponging step, and save the quick-dry formulas for your base coat.
- Try the “Peel-Off Base Coat” Trick: If you absolutely hate cleaning up your cuticles with acetone, paint your skin around your nail with a liquid latex barrier or a peel-off base coat before you start sponging. Once your ombre is done, simply peel the dried latex off your skin, taking all the messy polish with it and leaving perfectly clean skin.
- Less Is More on the Sponge: Do not saturate the sponge with a thick glob of polish. A thin, even layer of polish on the sponge gives you much more control over the gradient and prevents the color from flooding your cuticles.
- Roll the Sponge Slightly: While you are primarily dabbing up and down, a very slight rolling motion with your wrist can help blur the line where the gradient meets the base color.
Frequently Asked Questions (FAQs)
Why does my ombre look splotchy and not blended? This usually means your polish is drying too fast, or you are not dabbing enough times. Make sure you are using regular (not quick-dry) polish, and try dabbing the sponge 5 to 6 times on the same nail to build up the color gradually. Also, ensure your base coat is completely dry before sponging.
Can I do ombre nails on very short nails? Yes, absolutely! In fact, ombre looks fantastic on short nails. Because short nails have less surface area, the gradient is faster to apply. Just use a lighter hand when sponging so the color doesn’t overwhelm the tiny nail.
Do I really need a top coat for ombre nails? Yes, it is mandatory. The sponge leaves a matte, textured, stippled finish on your nails. A smooth, glossy top coat is what “melts” those dots together, instantly transforming them into a smooth, airbrushed, professional-looking gradient.
How do I fix a mistake without ruining the whole nail? If you make a mistake while sponging, wait for the polish to dry completely. Then, take a small brush dipped in acetone and gently wipe away the mistake. If the mistake is on the nail itself and you wiped away too much color, just reapply your base color over that spot, let it dry, and try sponging that specific nail again.
Conclusion
You do not need to be a professional nail technician or own expensive airbrushing equipment to achieve a stunning gradient manicure. By mastering the simple act of dabbing polish with a makeup sponge, you can unlock endless creative possibilities for your nails.
Learning how to do ombre nails at home gives you the freedom to customize your manicure to match any outfit, season, or mood. Grab a cheap makeup sponge, pick out two of your favorite colors, and take the time to practice. With a little patience and a good top coat, you will be rocking a flawless, airbrushed ombre look in no time!