
There is nothing quite like the glossy, chip-free perfection of a fresh gel manicure. For two to three weeks, your nails look flawless. But then, the inevitable happens: the gel starts to grow out at the cuticles, or a small chip appears on the edge. Suddenly, you are faced with the worst part of the gel experience: taking it off.
Many people make the mistake of trying to peel, pick, or bite the gel off. While it might be satisfying in the moment, peeling off gel polish is the fastest way to completely destroy your natural nails, leaving them thin, painful, and peeling for months.
If you want to protect your nail health and save money on expensive salon removal fees, you need to learn how to remove gel polish at home safely. It requires a little bit of patience and the right technique, but it is incredibly easy once you know the steps. Here is the ultimate, detailed guide to safely dissolving and removing gel polish.
Why You Should NEVER Peel Off Gel Polish

Before we get into the removal methods, we need to talk about the golden rule of gel polish: Never peel it off.
When you peel off gel polish, you are not just removing the color. Gel polish cures into a hard, plastic-like shell that bonds tightly to the top layers of your natural nail plate. When you forcefully peel that shell off, it acts like a strip of tape. It rips off the top 2 to 3 layers of your natural keratin along with it.
This leaves your natural nails paper-thin, weak, and highly sensitive. If you continuously peel off your gel, you will eventually cause permanent damage to the nail matrix (the root where the nail grows from), leading to ridged, stunted nail growth. No amount of cuticle oil or nail hardener can fix nails that have been violently peeled.
The Essential Gel Removal Toolkit

To properly execute gel nail removal at home, you need to gather a few specific supplies before you start. Do not try to improvise, as having the right tools makes the process seamless.
- 100% Pure Acetone: This is non-negotiable. Regular nail polish remover (non-acetone) will not dissolve gel polish. You need pure acetone, which breaks down the polymer bonds in the gel.
- Cotton Balls or Pads: You will need these to soak up the acetone. Cotton balls work best because they are fluffy and mold to the shape of your nail.
- Aluminum Foil: Standard kitchen aluminum foil cut into small squares (about 3×3 inches) to wrap around your fingertips.
- Coarse Nail File or Buffer Block: To break the shiny top seal of the gel.
- Wooden Cuticle Pusher or Orange Wood Stick: To gently push off the softened gel. Do not use metal pushers, as they can scratch your natural nail.
- Cuticle Oil and Hand Cream: For the crucial rehydration step at the end.
Method 1: The Foil Wrap Method (Best & Most Effective)
This is the standard, foolproof method used by professionals. It traps the heat and the acetone against the nail, allowing the gel to dissolve properly.
Step 1: Break the Top Seal
Gel polish has a hard, shiny top coat that acts as a barrier against the elements. If you do not break this seal, the acetone cannot penetrate the color layers. Take your coarse nail file and lightly buff the surface of every nail. You do not need to file all the way down to the natural nail; you just want to remove the shiny, glossy finish so the surface looks dull and frosty.
Step 2: Soak the Cotton Balls
Pour a small amount of pure acetone into a shallow glass bowl. Take your cotton balls and soak them in the acetone. You want them fully saturated, but not dripping wet. If they are too wet, acetone will leak out of the foil and get all over your hands, drying out your skin.
Step 3: Apply to the Nail
Place one soaked cotton ball directly on top of your first nail. Press it down firmly so it makes full contact with the entire nail surface.
Step 4: Wrap Tightly in Foil
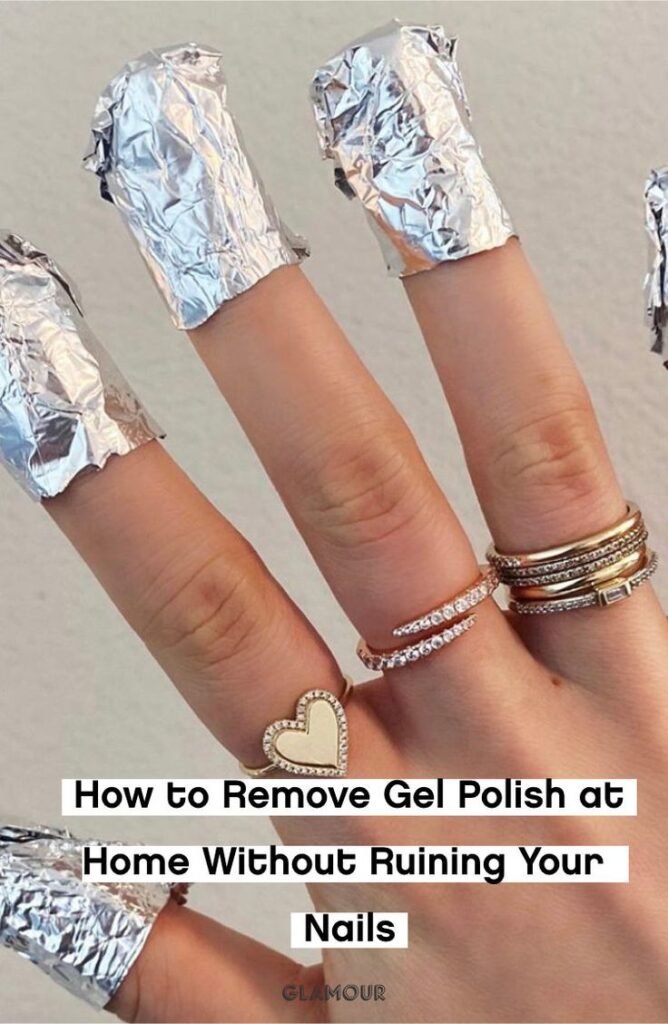
Take a square of aluminum foil and place the cotton-covered fingertip in the center. Fold the foil over the top of your finger, then fold the sides in to tightly seal the packet. It should feel snug but not painfully tight. The tightness is what holds the heat in. Repeat steps 3 and 4 for all ten fingers.
Step 5: Wait Patiently (The Hard Part)
Set a timer for 10 to 15 minutes. This is not the time to skip ahead! The acetone needs time to penetrate and break down the gel. If you try to remove the foil too early, the gel will still be hard, and you will be tempted to scrape it off, which causes damage.
Step 6: Gently Remove the Foil and Push Off the Gel
After 15 minutes, remove the foil from one finger. Leave the cotton ball on the nail for a second, and gently press down on it while sliding it toward the tip of your finger.
If the gel has dissolved properly, it will look like thick, sticky, jelly-like flakes that slide right off. Use your wooden cuticle pusher to gently scrape away any remaining softened gel. Important: If the gel is still hard and resisting, do not force it! Put the foil back on for another 5 minutes. For thicker, salon-grade gel, you may need up to 20 minutes total.
Step 7: Clean and Hydrate
Once all the gel is removed, wash your hands thoroughly with warm, soapy water to remove any lingering acetone residue. Acetone is incredibly drying to your skin and nails. Immediately apply a thick layer of hand cream and massage cuticle oil into your nail beds to restore the moisture barrier.
Method 2: The Bowl Soak Method (Faster but Messier)
If you hate the feeling of having all your fingers wrapped in foil, the bowl soak method is a great alternative, though it can be a bit messier.
- File the shiny top coat off your nails as described in Method 1.
- Pour about half an inch of pure acetone into a glass bowl.
- Warm the bowl slightly by placing it in a larger bowl filled with hot water for a few minutes. Never microwave acetone—it is highly flammable. The warmth speeds up the dissolving process.
- Submerge your fingertips in the warm acetone and let them soak for 10 to 15 minutes.
- Take one finger out at a time and gently push the softened gel off with a cuticle pusher.
Note: This method dries out your skin much faster because your whole fingertip is submerged in acetone. Be sure to heavily moisturize afterward.
Method 3: How to Remove Gel Polish Without Acetone
Sometimes you might be out of acetone, or you have an allergy to it. Is it possible to do gel nail removal without acetone? Yes, but with a major catch: it will not dissolve the gel.
Without acetone, you cannot melt the gel away. The only way to remove it without chemicals is to manually file it off.
- Use a coarse file (like a 100/180 grit file) and carefully file the gel down layer by layer until you reach your natural nail.
- Switch to a finer file to smooth out the surface.
The Danger: This method requires a very steady hand. If you accidentally file too hard or at the wrong angle, you will file straight through the gel and sand down your natural nail, causing severe damage. This method should only be used as a last resort.
The Preventative Trick: If you hate acetone, the best solution is to use a “Peel-Off Base Coat” under your gel polish the next time you do your nails. These special base coats create a barrier that allows you to literally peel the hardened gel off in one piece a week or two later without damaging your natural nail.
Post-Removal Care: Nursing Your Nails Back to Health
Even the safest gel nail removal process leaves your nails slightly dehydrated. After taking off a gel manicure, your nails might feel dry, brittle, or look slightly white and chalky. This is completely normal.
Here is how to fix it:
- Do not paint them immediately: Give your bare nails at least 24 to 48 hours to “breathe” and rehydrate before applying any new polish, even regular polish.
- Oil them constantly: For the next few days, apply jojoba cuticle oil 3 to 4 times a day. This will replace the natural oils stripped by the acetone and prevent the nail from peeling.
- Keep them short: File them down short while they are recovering. Short nails are less likely to snag and break when they are in a weakened state.
Frequently Asked Questions (FAQs)
Can I use non-acetone nail polish remover to take off gel? No. Non-acetone remover is designed for regular nail polish. It does not have the chemical strength to break down the cured polymer bonds in gel polish. You must use 100% pure acetone.
Why is my gel polish not coming off with acetone? This usually means one of two things: Either you did not file off the shiny top coat, meaning the acetone cannot penetrate the surface, or you simply have not soaked them long enough. Some thicker, pigmented gel brands take up to 20 minutes of foil wrapping to fully dissolve.
Is it normal for my nails to hurt after removing gel polish? If you removed the gel safely using the acetone method, your nails should not hurt. If your nails are throbbing or sore, it is usually because the nail technician filed your natural nail too thin during the initial application, or because you peeled the gel off instead of dissolving it.
How long should I wait before getting another gel manicure? Dermatologists recommend taking a break from gel polish for at least one to two weeks between applications. Giving your nails a break allows the keratin layers to recover and prevents long-term thinning and damage to the nail plate.
Conclusion
A beautiful gel manicure is a great confidence booster, but knowing when and how to remove gel polish at home is just as important as the application itself. By resisting the urge to peel, investing in pure acetone, and taking the time to properly foil-wrap and dissolve the product, you can safely take off your color while keeping your natural nails perfectly healthy and strong.
Take your time, follow the steps, pamper your nails with cuticle oil afterward, and your natural nails will thank you!