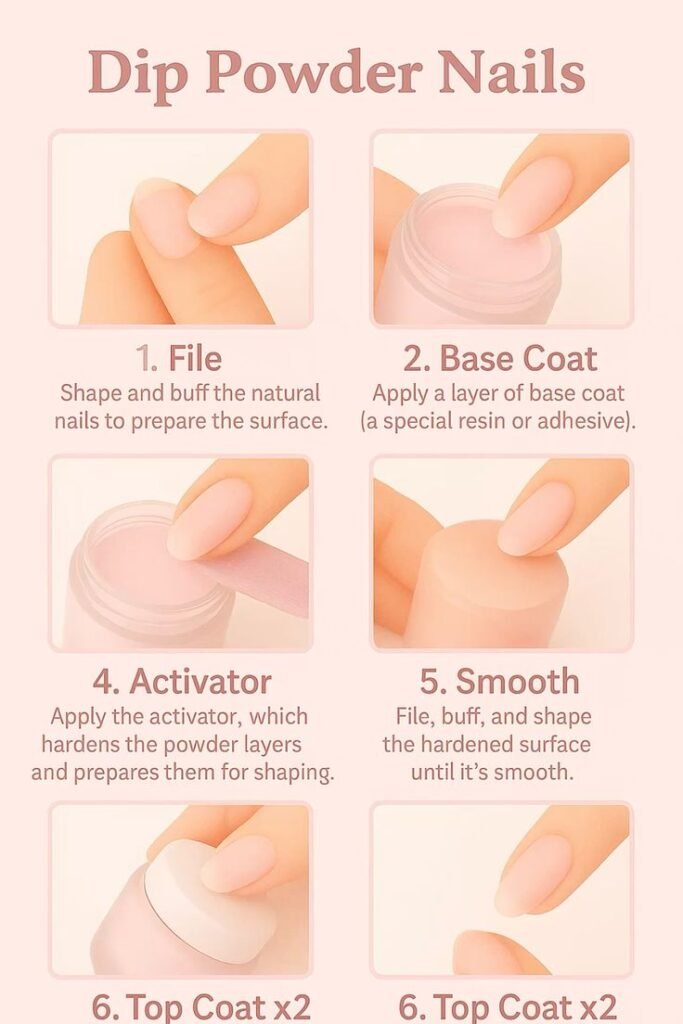
If you are tired of regular nail polish chipping after two days, but you do not want to spend $60+ at the salon every few weeks, it is time to look into dip powder. Over the last few years, dip powder manicures have completely taken over the beauty industry—and for good reason. They offer the incredible durability of acrylics without the harsh chemicals, the strong smell, or the bulky look.
The best part? You do not need a professional nail technician to get a flawless finish. Learning how to do dip powder nails at home is surprisingly simple once you understand the basic steps. Whether you are a complete beginner or someone looking to save money on salon visits, this comprehensive, step-by-step guide will walk you through the entire process from start to finish.
What Exactly Are Dip Powder Nails?

Before we dive into the application process, it helps to understand what dip powder actually is. Unlike traditional nail polish that dries via evaporation, and unlike gel polish that cures under a UV or LED lamp, dip powder uses a chemical reaction to harden.
The system relies on a specialized, glue-like liquid called a base coat. When you dip your nail into the finely milled powder, the powder clings to the wet base coat. Then, you apply an “activator” liquid. The activator chemically reacts with the base coat and the powder, fusing them together into a hard, durable, and glossy layer.
Because there is no UV light required, dip powder nails do not heat up or burn your fingertips, making the process much more comfortable for beginners.
Dip Powder vs. Acrylic Nails: Which is Better?

Many people confuse dip powder with acrylics because both result in a very hard, long-lasting nail. However, the application and the wearability are quite different.
The Application Process: Acrylics require mixing a liquid monomer and a powder to create a dough-like bead that the technician sculpts onto your nail before it hardens. This requires a lot of skill. Dip powder, on the other hand, simply involves painting a liquid and dipping the finger into a jar. There is no sculpting or timing required.
The Smell and Damage: Acrylics have a very strong, distinct chemical odor due to the monomer liquid. Dip powders are mostly odorless. Furthermore, the removal process for acrylics is notoriously harsh and can thin out your natural nail plate. Dip powder removal is much gentler when done correctly.
The Look and Feel: Acrylics can be made incredibly thick and long. Dip powder goes on much thinner and more naturally, feeling almost like a hardened gel polish. If you want a natural, lightweight look that lasts for three weeks, dip powder is the clear winner.
Everything You Need to Get Started
To achieve a salon-quality dip powder manicure at home, you need to make sure you have the right supplies. Most drugstores (like CVS, Walgreens, Boots, or Superdrug) sell beginner dip kits, but you can also buy professional-grade systems online.
Here is your checklist:
- Nail Prep Wipe or Rubbing Alcohol: To clean the natural nail.
- Nail File and Buffer Block: For shaping and removing the shine.
- A High-Quality Dip Powder System: This usually includes a 3-in-1 or 4-in-1 bottle system (Base Coat, Activator, Top Coat). Pro Tip: Avoid cheap “all-in-one” bottles where you just dip into one liquid. They do not last as long.
- Dip Powder Colors: Choose your favorite shades.
- A Small Brush and Dip Tray (Optional): For a cleaner application if you do not want to dip your fingers directly into the jar.
Step-by-Step Guide: How to Apply Dip Powder
Now for the main event. Set up your workspace, put on an old t-shirt you do not mind getting a little messy, and follow these exact steps.
Step 1: Prep Your Nails (Do Not Skip This!)
As with any manicure, prep is the secret to longevity.
- Remove any old polish.
- File your natural nails to your desired shape and length.
- Take a buffer block and gently buff the shiny surface off your natural nails. This gives the base coat something to grip. Do not buff too hard; you just want to remove the shine.
- Wipe your nails thoroughly with rubbing alcohol or a nail prep wipe to remove all the dust and natural oils. Let them dry completely.
Step 2: Apply the Base Coat and First Dip
- Take your Base Coat brush and paint a thin, even layer on one nail. Cover about three-quarters of the nail, staying slightly away from the cuticle so the product does not flood the skin.
- Immediately dip your finger straight down into the dip powder jar at a 45-degree angle.
- Pull your finger straight out.
- Tap the side of your finger gently to knock off the excess loose powder. You should see a smooth, powdery layer left on the nail.
- Repeat this process for all ten fingers.
Step 3: Build the Color (2nd and 3rd Dips)
One dip is usually too sheer. To get a solid, opaque color, you need to repeat the process.
- Apply a second thin layer of Base Coat directly over the powdery first layer. (Yes, you paint the liquid right over the dry powder).
- Dip the finger into the powder again at a 45-degree angle.
- Tap off the excess.
- Repeat this for a third time if the color is still not opaque enough. Three dips is the standard for most colors.
Step 4: The First Activator Layer
Once you have your solid color, you need to harden it.
- Take a clean, dry makeup brush or a dusting brush and gently brush away any loose, fluffy powder from around your cuticles and under your nails.
- Paint a thin, even layer of the Activator over all ten nails.
- Wait about 1 to 2 minutes. You will notice the powder suddenly melt together and look smooth and shiny.
- Once dry, take your nail file and file the surface of the nail. You want to smooth out any ridges, shape the free edge, and blend the powder down toward the cuticle so it looks perfectly flush with the natural nail.
- Use your dusting brush to wipe away all the filing dust.
Step 5: The Second Activator Layer
- Apply a second thin layer of Activator over the smooth, filed nails.
- This second layer prepares the surface for the top coat and ensures the color seals completely. Wait 1 to 2 minutes for it to dry.
Step 6: Top Coat and Final Activator
- Apply a thin, even layer of the Top Coat. Be very careful not to get it on your skin, as the top coat is very sticky before it is activated.
- Immediately apply a final, very thin layer of Activator over the wet Top Coat.
- This locks in the shine and hardens the top coat instantly.
Important Final Step: Wash your hands thoroughly with warm soapy water. The activator leaves a sticky residue on your skin that feels like dried glue. Washing your hands will remove this residue completely, leaving your cuticles soft and your nails incredibly glossy.
Pro Tips for a Flawless Dip Manicure
- Angle is Everything: Always dip your fingers into the jar at a 45-degree angle. If you go straight in and pull straight up, you will push powder up under your cuticles, creating a thick, raised ledge that is hard to file away.
- Less is More with Liquids: Whether it is the base coat, activator, or top coat, never apply thick layers. Thick layers take forever to dry, wrinkle, and easily peel off. Thin, even coats are the key to a three-week manicure.
- Cap the Free Edge: When applying your base coat and top coat, slightly swipe the brush over the very tip (front edge) of your nail. This “caps” the color and prevents the tip from chipping.
How to Safely Remove Dip Powder at Home
One of the biggest advantages of learning how to do dip powder nails at home is that you can remove them safely without destroying your natural nails. Never peel dip powder off! Peeling it will rip off the top layers of your natural nail, leaving them paper-thin and sore.
- File off the shiny top coat. You do not need to file all the way down to the natural nail; just break the seal so the acetone can penetrate.
- Soak a cotton ball in 100% pure acetone.
- Place the soaked cotton ball directly on your nail.
- Wrap the fingertip tightly in a small square of aluminum foil to hold the cotton ball in place. Repeat on all fingers.
- Let your nails soak for 15 to 20 minutes.
- Remove the foil one finger at a time. Gently push the softened dip powder off the nail with a wooden cuticle pusher. It should slide right off like butter. If it is still hard, wrap it back up for another 5 minutes.
- Wash your hands and immediately apply cuticle oil to rehydrate your nails.
Frequently Asked Questions (FAQs)
Can dip powder be applied over fake nails or tips? Yes! If you want extra length, you can apply plastic nail tips to your natural nails with nail glue, and then apply the dip powder directly over the plastic tip exactly as you would over your natural nail.
Do you need a UV lamp for dip powder? No. Dip powder cures chemically using a liquid activator. You never need to sit under a UV or LED lamp, which makes the process much faster and more comfortable than gel polish.
How long do dip powder nails actually last? When applied correctly with proper nail prep, a dip powder manicure can easily last 3 to 4 weeks without chipping, lifting, or losing its shine. The grow-out line at the cuticle is usually the only reason people remove them.
Is dip powder bad for your natural nails? The powder itself is not harmful. However, if you file your natural nails too aggressively during the prep stage, or if you peel the powder off instead of soaking it in acetone, you will cause damage. As long as you prep gently and remove safely, your natural nails will remain perfectly healthy.
Conclusion
Switching to a dip powder manicure is the best way to get long-lasting, chip-free, beautiful nails without stepping foot inside a salon. While the process has a few more steps than regular polish, the results are absolutely worth it.
By following this guide on how to do dip powder nails at home, prepping your nails correctly, and remembering to use thin layers, you will be able to achieve a flawless, professional-looking manicure in under 45 minutes. Grab a dip kit, pick your favorite color, and enjoy weeks of perfect nails!